Ducky ProjectD Outlaw65 Keyboard Kit
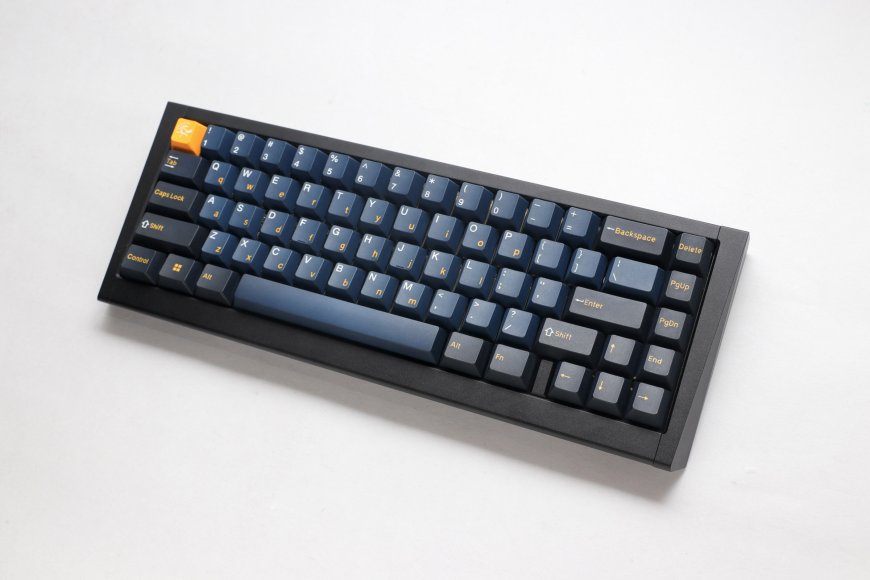
The article reviews the Ducky ProjectD Outlaw65, a kit designed for those interested in building their own mechanical keyboard. This compact kit includes almost everything needed for assembly, except for switches and keycaps. It is positioned as an option for enthusiasts who prefer customizing their keyboards to pre-built ones.
The Appeal of Building Your Own Keyboard
Customization and Personal Preferences
The author questions the appeal of building a keyboard when pre-built options are available, concluding that the main allure is the opportunity for customization. This includes lubing stabilizers and switches, as well as customizing often inaccessible layers of the keyboard. The appeal largely lies in the enjoyment of the process and personalization.
Also check Klipsch ProMedia 2.1 - A Time-Tested Audio Solution
Assembly Experience
Ease of Assembly
Despite the ease of assembly following the provided instructions, the author notes that the process took around 2.5 hours. This was partly due to filming the process and multitasking with other work. The kit comes with a neat black carry case containing all necessary components, including metal parts, a PCB, sound dampening materials, electrical parts, screws, washers, and rubber grommets.
Tools and Components
Ducky provides the necessary tools for assembly, including an allen key and a branded screwdriver. Although the screwdriver is specific to the kit's small components, its quality is highlighted as exceptional.
Building the Keyboard Base
Initial Steps and Materials
The base construction starts with assembling the adjustable feet and the surround for holding the PCB and other components. The keyboard, being a 65% unit, is quite heavy, weighing in at around 1.3kg when completed, which is more than the larger Asus ROG Strix Scope II 96.
Preparing and Setting the PCB
Lubricating and Installing Stabilizers
The first step in preparing the PCB is to lube the stabilizers, which are included in the case. Lubing stabilizers is essential for improving the typing experience and ensuring smooth key actuation. The kit includes lube and a brush for this purpose. The stabilizers are then fitted onto the PCB, a process slightly complicated by differing layout instructions.
Choosing and Mounting the Base Plate
Options and Material Differences
The kit offers a choice between a black FR4 plate with gold trim and a white POM plate, each offering different feel and sound characteristics. The author opts for the FR4 plate, noting that the white POM plate might enhance the RGB LED effects.
Final Assembly Steps
Completing the Keyboard
The final assembly involves placing the sound dampening foam, attaching the USB connector, and assembling the keyboard's inner components into the metal frame. The process is concluded by screwing everything together.
Installing Switches and Keycaps
Choice of Switches and Caps
The author uses NovelKeys Novelias switches for the build but doesn't lube them. The switches are then inserted into the keyboard. Keycap installation follows, requiring some adjustments due to the keyboard's unique layout, especially for the left-hand shift key and the row of keys on the right-hand side.
Artisan Keycaps and Final Thoughts
Adding Personal Touch with Artisan Keycaps
Special Jelly Key artisan keycaps are added, enhancing the keyboard's aesthetic appeal. These keycaps feature Mario-style worlds and a translucent space bar that allows the RGB lighting to shine through.
Appreciating the Completed Build
Once assembled, the keyboard offers excellent tactile feedback and solid construction. The heavy switches used are not ideal for gaming but still provide a responsive experience. The author finds the process of building the keyboard from scratch satisfying, despite the high price tag of £300 for the 'First Edition' (which includes switches and keycaps) and $299 in the US without them.
Conclusion: The Joy of Keyboard Building
The Satisfaction of DIY Keyboards
The Ducky ProjectD Outlaw65 is presented as an excellent option for those who enjoy the process of building and customizing their mechanical keyboards. While it is not a cheap or necessary endeavor, the satisfaction derived from creating a personalized keyboard is highlighted as the kit's main appeal.
